How frustrating is it when you scroll across a spreadsheet, and all the useful information disappears? Give your memory a break with the excel freeze function!
Excel is an incredible tool for storing and managing data. However, scrolling across or down a spreadsheet is inevitable when dealing with magnitudes of cells. It would be ever so helpful to see the column and/or row titles while navigating other areas of the spreadsheet to make sense of and compare data.
BAM! In walks the Excel freeze function to save us all from repetitive strain injury.

So where can you find this handy tool?
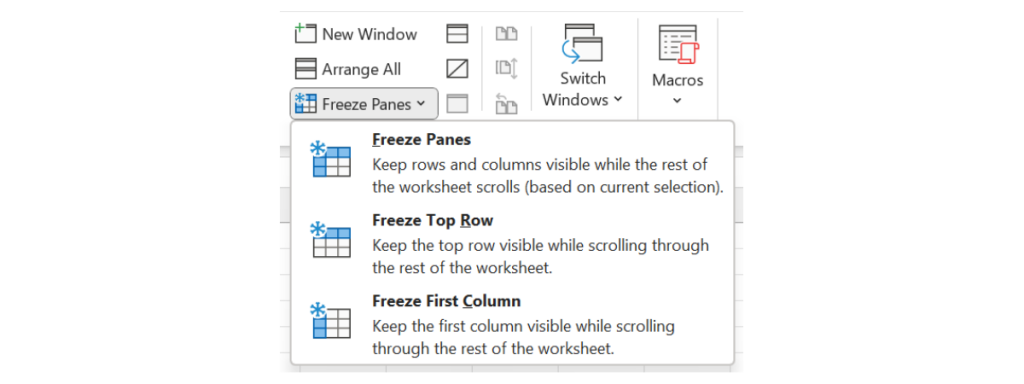
From the open spreadsheet, select the ‘View‘ tab and then the ‘Freeze Panes‘ function, which is found in the ‘Window’ group of the View tab (Select View > Freeze Panes).
From here, you can see three options:
- Freeze Panes
- Freeze Top Row
- Freeze First Column


To get to grips with how to use the different Freeze options, check out the examples below!
1. Freeze Top Row
From freeze panes, select ‘freeze top row’.
Excel will automatically freeze the first row of the spreadsheet, which is indicated by a dark grey horizontal line beneath the first row.
2. Freeze First Column
From freeze panes, select ‘freeze first column’.
Again, Excel automatically freezes the first column of the spreadsheet, which is indicated by a dark grey vertical line to the right of the first column.
3. Freeze Panes
The above are extremely straightforward but don’t allow much flexibility. Freeze panes is slightly more complicated but gives more freedom.
For example, you can freeze multiple rows, multiple columns or multiple rows and columns.
3.1 Freezing multiple rows
If you were looking to freeze a certain number of rows, select the row below the last row you want to remain visible and select freeze panes.
For example, if you want the first three rows to remain visible, select row four and freeze panes.
A dark grey horizontal line above row four and below row three indicates that these first three rows will remain visible whether you scroll up or down.
3.2 Freezing multiple columns
Freezing multiple columns is similar to the above example of freezing multiple rows.
Select the column to the right of the columns you want to remain visible and select freeze panes.
For example, if you want the first three columns to remain visible, select column four and freeze panes.
A dark grey vertical line to the left of column four and the right of column three indicates that these first three columns will remain visible whether you scroll left or right.
3.3 Freezing rows and columns
But what do we do when we want to freeze columns and rows?
Instead of selecting an entire row or column, we set one cell that controls which columns to the left and rows above are visible.
For example, if we want to freeze the first row and column, select the cell two rows down and two columns across (B2).
A dark grey vertical line to the left of the cell and a dark grey horizontal line above the cell indicates that the first row and column will remain visible whether we scroll across or down the spreadsheet.
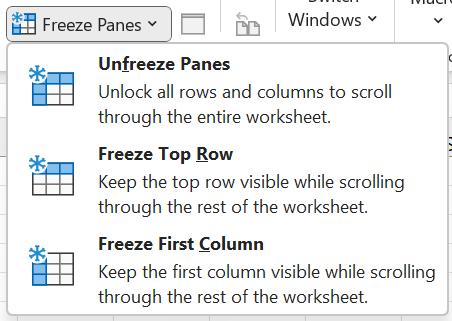
4. Unfreeze Panes
After applying one of the three Freeze Pane options, the top Freeze Pane option will be replaced with ‘Unfreeze Panes‘. Simply select this to remove all columns and rows that have been frozen.
Thanks for reading, and we hope this helped! For more tips and tricks, check out our other blogs here!
Want more hands-on training? Infero also offers multiple Excel courses that will take you from beginner to pro. Get in touch for more information, book a course or receive a free consultation using the details below!


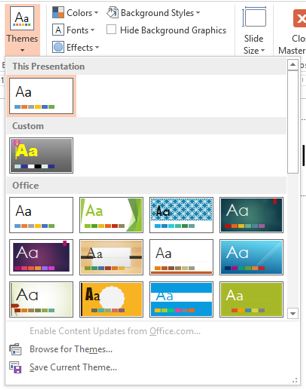 colorful theme and add special fonts and effects, or click Themes, and choose a theme from the gallery. Use the scroll-bar on the right to see more themes.