Archive for the 'Tips and Tricks' Category

Visual Basic Tip: Recycling Code

If you are new to Visual Basic, and want to start writing Macros for various MS application (most popular are Word and Excel), there are several ways in which you can utilize VB code without the need to spend time writing it from scratch. As with anything code and software related, while following our tips remember to test, test and test again to eliminate any problems, errors and to ensure quality and code is not causing any further problems or clashes when applied.


This is the No.1 tip I give whenever I conduct one of our Visual Basic Courses for Excel. Use code that has been written before and adapt it to your own uses. Google is great for such things, but you may spend a bit of time looking for the right code or website.


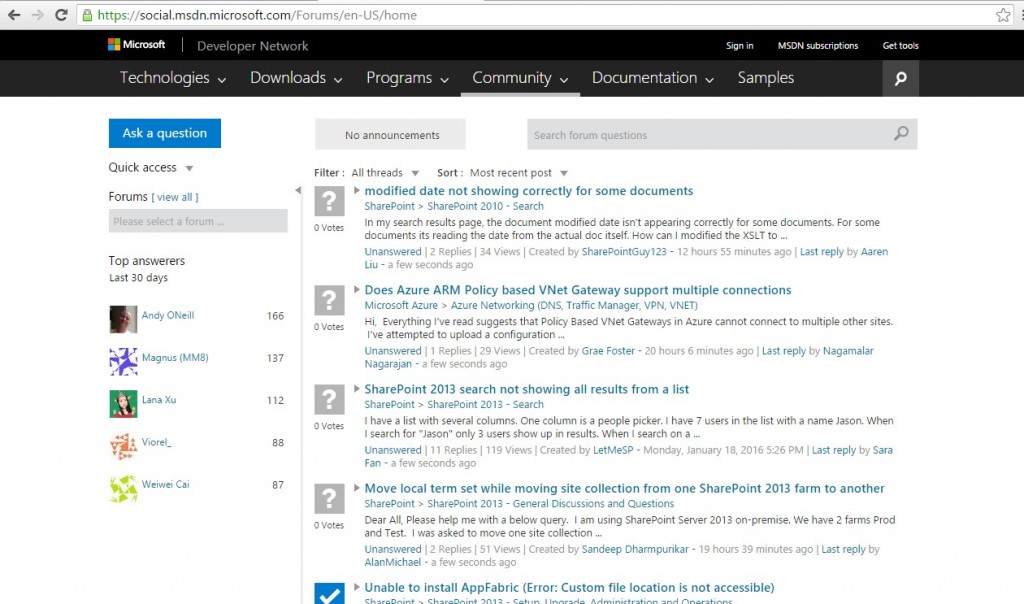
I always suggest checking out the Microsoft Developers Network (MSDN.com) for ideas on code when conducting of one our VBA courses (MSDN). You can always use their forums or Facebook and Twitter pages for a few hints and tips and exchanging code. You can also use the MSDN’s extensive knowledge base, documentation and help pages on a variety of VB related stuff as well as further your own knowledge. A brilliant tool for developers and programmers at any stage of experience.


recycle


We hope you found this tip helpful. If you want more information, check out our VBA Courses or our other Visual Basic Application Hints and Tips.


Was this tip helpful? Let us know, we would love to hear. Find us on Facebook and Twitter
Office 365 Tip: Creating Sites

Office 365 Sites are a good way of creating social pages for your business and creating spaces where various departments can share, interact and store information that only they can access. So here is how to create one.


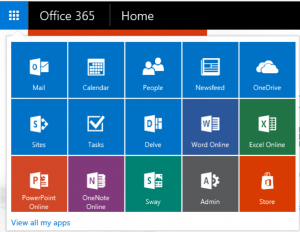
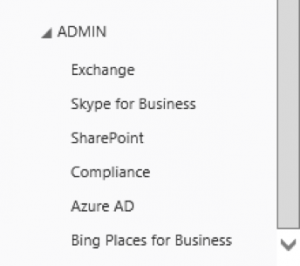
To create a Site, Log on to your Office 365 account and if you are an administrator, find the Admin Tab.


Picture1
Under Admin, Click on SharePoint and under site collection a new Ribbon will appear.


Picture1


Click on New then Private Site Collection as per picture below and a pop up Site Wizard window will appear, fill out all the spaces. You will need to give your site a unique name. I would consider naming by Department or Function of the site to make it easy to find.


Picture1Picture1


Picture1


Add a person as a Administrator to help control what happens on the site and allow for a person to be responsible for adding documents, other employees….etc to the site.


Picture1
Once you have created your Site, it will look something similar to this:


Picture1


Sites can be very useful especially if certain individuals are constantly moving or traveling, or want to access certain documents and contact other individuals without the need to access files remotely. Like much of Office 365, Sites can also be accessed via a tablet, smart phone or ay hand held device with Internet connectivity.


Found this tip helpful? then let us know via our Facebook and Twitter pages.


Microsoft Access Tip: Creating Relationships

A great tool in Access is Relationship; which is used to combine information between two or more tables. You need more than one table to do this. So the first step would be to create two or more tables relative to your database.


To start, you need to Select the Database Tools tab in the Ribbon, in the Relationships command group and click Relationships.


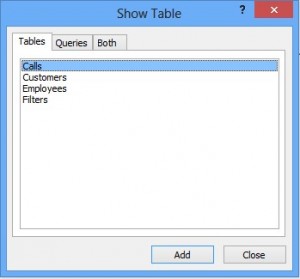
If you haven’t yet defined any relationships between your tables, the Show Table dialog box will appear automatically. To find Show Table dialog box however, all you have to do is click on the Design contextual tab, in the Relationships group click Show Table.


Once the Show Table dialog box appears, it will display all of the tables and queries in the database. To see only tables, click Tables tab.


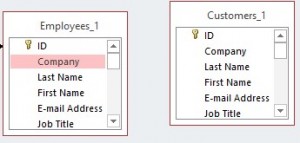
Select one or more tables, and then click Add. For this example, we are looking at creating a relationship between Customers and Employees tables. Click Close when you are done.


Drag a field (typically the primary key) from one table to the common field (the foreign key) in the other table. You can drag multiple fields by pressing the Ctrl key on your keyboard and click each field you want, and then drag them. You can do this between Multiple Tables to any field required.


Dragging from one field to the other is the easiest way of creating instant relationships.


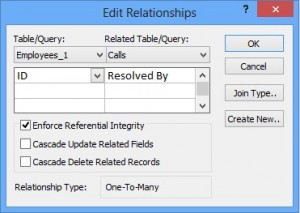
The Edit Relationships dialog box appears.


Verify that the field names shown are the common fields for the relationship. If you want to edit it or if a field name is incorrect or you have changed your mind, simply click on the field name and select the appropriate field from the list.


To enforce referential integrity for this relationship, select the Enforce Referential Integrity box. Note that Relationship Type appears at the bottom. Click Create New button to create more relationship and add the details in the Create New dialog box


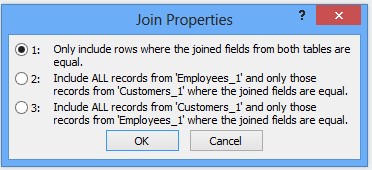
And if can set the Join Type by click the relevant button:


When you are finished in the Relationships window, click Save to save your relationship layout changes.


We hope that you found this tip insightful and helpful, if you would like any more access tip’scheck out our others.

Don’t forget to follow us on Facebook and Twitter

Excel Tip: Conditional Formatting

Conditional formatting is a feature within Microsoft Excel which is used for highlighting cells with a certain color, depending on the cell’s value. It can be a great tool for your Excel sheets, as it has various purposes and outcomes, whether you are after the top 5 values or a simple way to values that need your urgent attention.


To get to conditional formatting, go to the Home tab, then to the Styles command group:

conditional formating


There are plenty of in-built options for users who don’t want to modify anything or want to do things on the go. However, Excel gives users the chance to customize their own rules for conditional formatting for that added personal touch.


Conditional Formatting


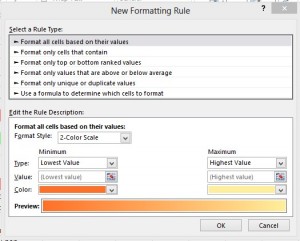
To customize your own rules, follow the same steps above, select the New Rule command to bring the New Rule Dialogue Box.


Want to learn more? Check out our Courses and our other Hints and Tips


Project 2013 Tip: Using the Task Inspect Tool

The Task Inspect Tool was introduced by Microsoft in Project 2010 to help project managers have even more control on their project and help, especially in long and complicated projects, and to determine and track down the causes of slipping tasks, which can be very problematic.  Trying to determine which predecessor relationship is pushing the scheduled start date out can be difficult with linked tasks residing multiple screens away.


After you have added your tasks, assigned resources and set your predecessors, you can use the Task Inspect too to help manage the project easily, without the need to bring up the Task Information Dialogue box every time.


To get the Task Inspect Tool:


1) Go to Task Tab on the Ribbon and head to the Tasks Command Group


pic 1


2) Click on the Inspect command


pic 2


3) This will bring the Task Inspect Tool next to the Ghant Chart Table view in Project. Now every time you select a Task the Task Inspector will bring all the details (predecessors, Assigned Resources, Calendars…) up in a simpler view.

pic 4pic 3


As you can see from screen grab, the Task Inspector can also be useful if Resourced assigned to the tasks are over allocated and will give you possible solutions.


If you want to learn more about Microsoft Project, join our Microsoft Project course. You can also sign up to mailing list for more hints & tips on Project and other MS applications.

Microsoft Outlook Tip: Creating Email signatures

In this tip, we will guide you on how you can create your own personal email signature which can be added to the end of each email that you send from Microsoft Outlook 2007 and 2010. A new start for a New Year!


Having a signature which contains your contact details means that the recipient is more likely to remember your details, especially if you have a healthy backward-forward dialogue going with them through emails. The recipient will also know who they need to talk with and their position within the company, ensuring that they are dealt with by the right person and in the most effective way.


Microsoft Outlook Tools


To set up your own custom Microsoft Outlook signature in 2007, follow these simple steps:


  • Select Tools > Options > Mail Format tab.
  • Click Signatures > and go to the E-mail Signature tab > New.
  • Type the new signature’s desired name.
  • Click OK.
  • Type the desired text of your signature under Edit signature.
  • You can use the formatting toolbar to format your text, or insert an image in your signature.
  • Click OK.


Email Signiture 1

To set up your own custom Microsoft Outlook signature in 2010 , follow these simple steps:


  • Select the Home tab > and click New Email.
  • In the Message tab > Signature > and click Signatures.
  • This will bring up a Signatures and Stationery box.
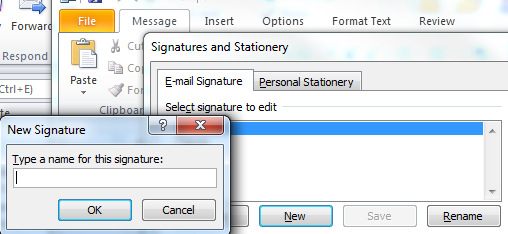
  • Click New and type the name of what you wish to call your signature, and click OK.
  • Type the desired text of your signature under Edit signature.
  • You can use the formatting toolbar to format your text, or insert an image in your signature.
  • Click Save > OK.

Email Signiture 2


If you would like to read more Microsoft Outlook tips, please visit our Outlook Tips page.


If you would like to learn more about Microsoft Outlook, then you should book yourself on one of our Microsoft Outlook Training Courses. Just give us a call or drop us an email; we are more than happy to help!

Microsoft Word Tip: New Years Resolutions

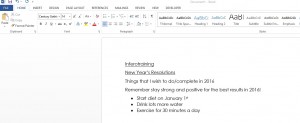
With a New Year lurking around the corner, it’s around that time when people start to make New Years Resolutions, So here’s how you can use Microsoft Word to assist your goals.


Microsoft has features so that you can bullet point everything that you would like to accomplish, you can also highlight and underscore important sentences. By using Word you can also print out your document so you can tick things off and have it as a reminder to yourself.

Here’s a rough idea… media


To be able to create bullet points, select the text you would like to change and just simply click Home and then click the 3 dots to access the bullet point tool.

gnf


We hope you found this helpful and that you have a wonderful New Year.

Microsoft Word Tips : Table of Contents

TImagine you’re working with a really long document in Microsoft Word, like an academic paper or a big report. Depending on the project, it might be dozens or even hundreds of pages long! When a document is this large, it can be difficult to remember which page has what information. Fortunately, Word allows you to insert a table of contents, making it easy to organize and navigate your document.

A table of contents is just like the list of chapters at the beginning of a book. It lists each section in the document and the page number where that section begins.

You could create a table of contents manually—typing the section names and page numbers—but it would take a lot of work. And if you ever decide to rearrange your sections or add more information, you’ll have to update everything all over again. However, with the right formatting, Word can create and update a table of contents automatically.

We’ll use Word 2013 to show you how to create a table of contents, but you can use the exact same method in Word 2010 or Word 2007.

Microsoft PowerPoint Tips: Finding Your Most Recent Documents

Finding recent documents has been made easier in Office.  Looking at PowerPoint 2007 and 2013 we will look at the differences between the ease of access.


When you need to find a certain document you needed to click Open from Office button then search through your documents looking for the right one.  With Microsoft PowerPoint 2007 you can find everything much easier.


If you click on the Office button on the top left and it comes up with the main menu and on it will be your most recent documents that you have worked on and saved.  So if you need to open up one of those documents again you can just click on it from that list and it’s done.  So it saves you looking through your documents trying to find the right one.


Recent Documents in PowerPoint 2007


This feature can also be done in Microsoft PowerPoint 2013.  All you need to do is click Open from the File Tab and your Recent Presentations can be viewed straight away just like below.  In PowerPoint 2013 you are able to see the first slide, making it easier to remember what presentation you want.


blog


Read about our Microsoft PowerPoint Courses if you are interested in learning more.

Introducing Sway!

462ae32184d166b666d3270546db7e8fe1744baa


In August 2015, Microsoft released a brand new software called, Sway – an online package to create and share your amazing stories, presentations and more!


It is a part of the Microsoft Office Online package; similar to Excel, PowerPoint, and Word Online. Sway can be used to create presentation style websites which are great for for telling stories or documenting an event. So how about having a go and documenting your fantastic Christmas and making it a one that no one will forget.


In a nutshell, Sway is an updated version of PowerPoint that is more user friendly. At a glance its easy to follow and if you wish to import media into your project then you don’t even need to leave the app.


Sway is currently available on Windows 10 and IOS, However it must be a downloaded app. alternatively it can be accessed through Office Online.


With Christmas just around the corner most families like to document the celebrations by videoing the special occasion, but using Sway takes it to another level. You can upload videos, pictures, and add text to a family friendly user face and share it directly to social media like Facebook and Twitter.


So check it out, and show us your results!